django第二篇,本篇使用django完成一个图书管理系统。
通过这篇文章,你能了解到:
- 使用django完成一个简单的图书管理系统。
- 在学习细节之前通过该例来熟悉django的整个流程,所以该例会有很多不足,未来也将用新的知识来进行改进。
概述
该图书管理系统涉及出版社的管理、图书的管理以及作者的管理。
出版社的管理
- 展示
- 新增
- 删除
- 编辑
准备工作
创建项目
pycharm –》 new project -》 选择解释器,输入app名字,我输入的名字是app01
settings
检查 settings.py 配置的内容:
app01已创建
注释
MIDDLEWARE中 关于csrf的那一条,防止提交时出现问题1
2
3
4
5
6
7
8
9MIDDLEWARE = [
'django.middleware.security.SecurityMiddleware',
'django.contrib.sessions.middleware.SessionMiddleware',
'django.middleware.common.CommonMiddleware',
#'django.middleware.csrf.CsrfViewMiddleware',
'django.contrib.auth.middleware.AuthenticationMiddleware',
'django.contrib.messages.middleware.MessageMiddleware',
'django.middleware.clickjacking.XFrameOptionsMiddleware',
]检查
TEMPLATES中的DIRS,cmd创建的需要配置,pycharm不用。在
STATC_URL后面写STATICFILES_DIRS1
2
3STATICFILES_DIRS = [
os.path.join(BASE_DIR,'static')
]note:
STATC_URL只是一个别名,必须配置具体的路径,这样别名才有效。路径中只需要以/static/开头就可以。
pymysql
在做关于数据库的事情之前,我们先切换数据库操作模块(默认只支持python2)
在
settings.py同目录的__init__.py中写如下两条语句:1
2import pymysql
pymysql.install_as_MySQLdb()
创建数据库
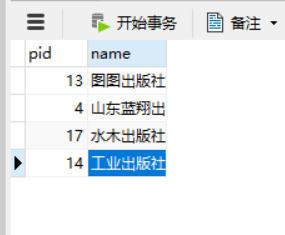
我们先做的是出版社的管理,所以,先构建关于出版社的表。
这个表只有两列:pid和出版社名称。
cmd创建一个图书管理系统的数据库
登录:
mysql -u 用户名 -p 密码创建:
create database library;
使用orm创建类(对应数据库中的表)
在
models.py中创建类1
2
3
4
5
6
7
8class Publisher(models.Model):
pid = models.AutoField(primary_key=True)
name = models.CharField(max_length=32,unique=True)
def __str__(self):
return f"{self.name}"
__repr__ = __str__
# 定义 __repr__是为了在打印对象列表/字典的时候,里面显示的内容为__repr__定义的
配置数据库
再次打开
settings.py配置MySQL 数据库1
2
3
4
5
6
7
8
9
10DATABASES = {
'default': {
'ENGINE': 'django.db.backends.mysql',
'NAME': 'library',
'HOST':'127.0.0.1', # ip/localhost
'PORT':'3306', # 端口
'USER':'xxx', # 用户名
'PASSWORD':'xxx', # 密码
}
}
执行迁移
python36 manage.py makemigrations制作迁移文件/变更记录python36 manage.py migrate执行迁移
nvicate 添加记录
添加几条出版社的信息,结果如下
展示(查)
建立对应关系
开始写函数,首先建立对应关系。在 urls.py 中写如下内容:
1 | from app01 import views |
这样 url 与 函数的对应关系就可以建立起来了。
写对应函数
在 views.py 中定义 publisher_list
定义函数的时候,如果没有思路,就从最终目的开始分析,比如这个函数,我们最后的目标是要返回带有数据的页面。所以在这个之前自然就是获取数据喽。
1 | # views.py |
写对应HTML
下面是对应的html页面,使用了bootstrap样式。
首先选取bootsrap的实例精选中的控制台,把它的html和css样式扒下来。
然后删除左侧栏中多余的内容,删除右侧的全部内容。
右侧内容放置一个 table 表格
写增加,删除,编辑这几个标签
publisher_list.html
这个html页面是最完整的,后面的页面也只是把中间的内容换一下。
1 |
|
模板的语法:
- {{
all_publisher}} 表示变量 - { % for i in li % } 表示for循环
1 | {% for i in all_publishers %} |
- { {
forloop.counter}} 字典,显示循环次数
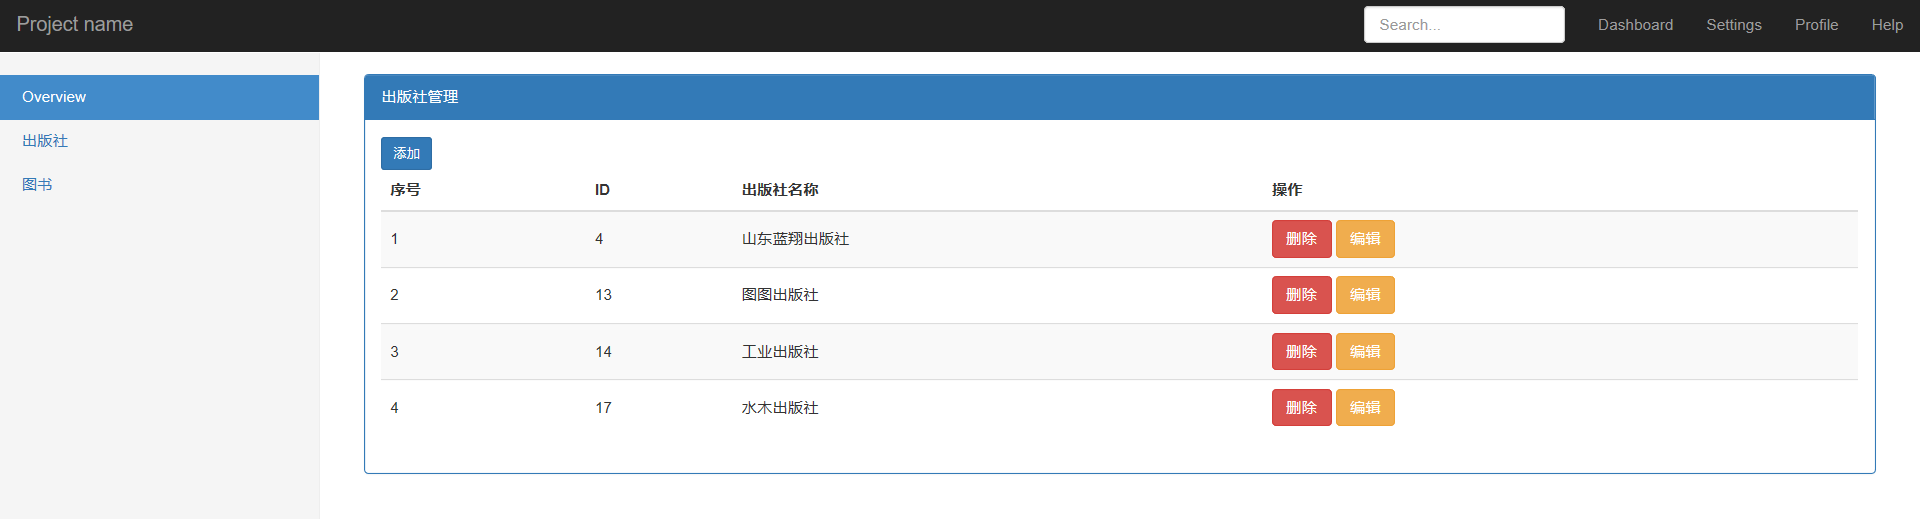
效果
增加
建立对应关系
urls.py 下的 urlpatterns中添加:
1 | url(r'^publisher_add/', views.publisher_add), |
写对应函数
- 添加记录的两种方式:一种是使用
models.Publisher.objects.create(name=pub_name)方式;一种是obj = models.Publisher(name=pub_name),但在后面还需要加一句obj.save()来提交到数据库。
views.py
1 | def publisher_add(request): |
写HTML
- 只是把原来表格换成表单,表单里放置输入和提交
publisher_list.html
1 | <div class="panel panel-primary"> |
效果
删除
在这里不需要去写它的HTML页面,我们只需要在 publisher_list.html 的基础上加入 error 提示,就可以。
建立对应关系
urls.py 下的 urlpatterns中添加:
1 | url(r'^publisher_del/', views.publisher_del), |
写对应函数
- 删除数据有两种方式,一种是
对象列表.delete()、一种是对象.delete()
在views.py 中继续定义:
1 | def publisher_del(request): |
修改publisher_list.html
- 只是在
</table>下加了一个 span
1 | <div class="panel-body"> |
编辑
修改的话,其实和添加很相似了,不过对于编辑,会在输入框中显示原来的内容。
~Q(CSBN=None)表示CSBN != None
建立对应关系
urls.py 下的 urlpatterns中添加:
1 | url(r'^publisher_edit/', views.publisher_edit), |
写对应函数
views.py
1 | def publisher_edit(request): |
写HTML
- 编辑与添加相似,只是增加了对原来输入的显示。
publisher_list.html
1 | <div class="panel panel-primary"> |
效果

小结
本章回到的知识点有:
render用来展示内容,他不会改变url的路径,只会在后面进行拼接;第三个参数可以向HTML中传递数据。
模板语法,如何将数据放到html页面内
- 表示变量
- for循环
1
2{% for i in all_publishers %}
{% endfor %}- 字典,显示循环次数
orm操作
- 增加 create / 实例化
- 删除 对象/对象列表 delete
- 修改 对象属性的重新赋值
图书的管理
增加了图书,宏观上和以前有什么不同?首先,因为有新增了一个类,它们之间就会产生联系,这里假设出版社与图书是一对多关系,所以由此产生外键,这也是下面的一个新知识点。
准备工作
使用orm创建类
打开 models.py 我们将新定义一个类,类名为Book。
这个类有两个属性,一个是书名 title 一个是出版社的pid(外键),这里假设出版社与书是一对多关系。
1 | class Book(models.Model): |
models.ForeignKey('Publisher',on_delete= )
对于关键字参数 on_delete
- 它是指当关联的数据删除时该数据怎么办
on_delete=models.CASCADE级联删除,关联的数据没有了,该数据也没了on_delete = models.SET系列、 SET_DEFAULT设置默认,SET_NULL设为空,SET(VALUE)设为某值。on_delete = models.Do_NOTHING啥也不做
执行迁移
python manage.py makemigrations 扫描models,记录变更
python manage.py migrate 与数据库同步
nvicate添加记录
使用nvicate添加几组数据:

展示
建立对应关系
urls.py 下的 urlpatterns中添加:
1 | urlpatterns = [ |
写对应函数
views.py 中完善函数 book_list
1 | def book_list(request): |
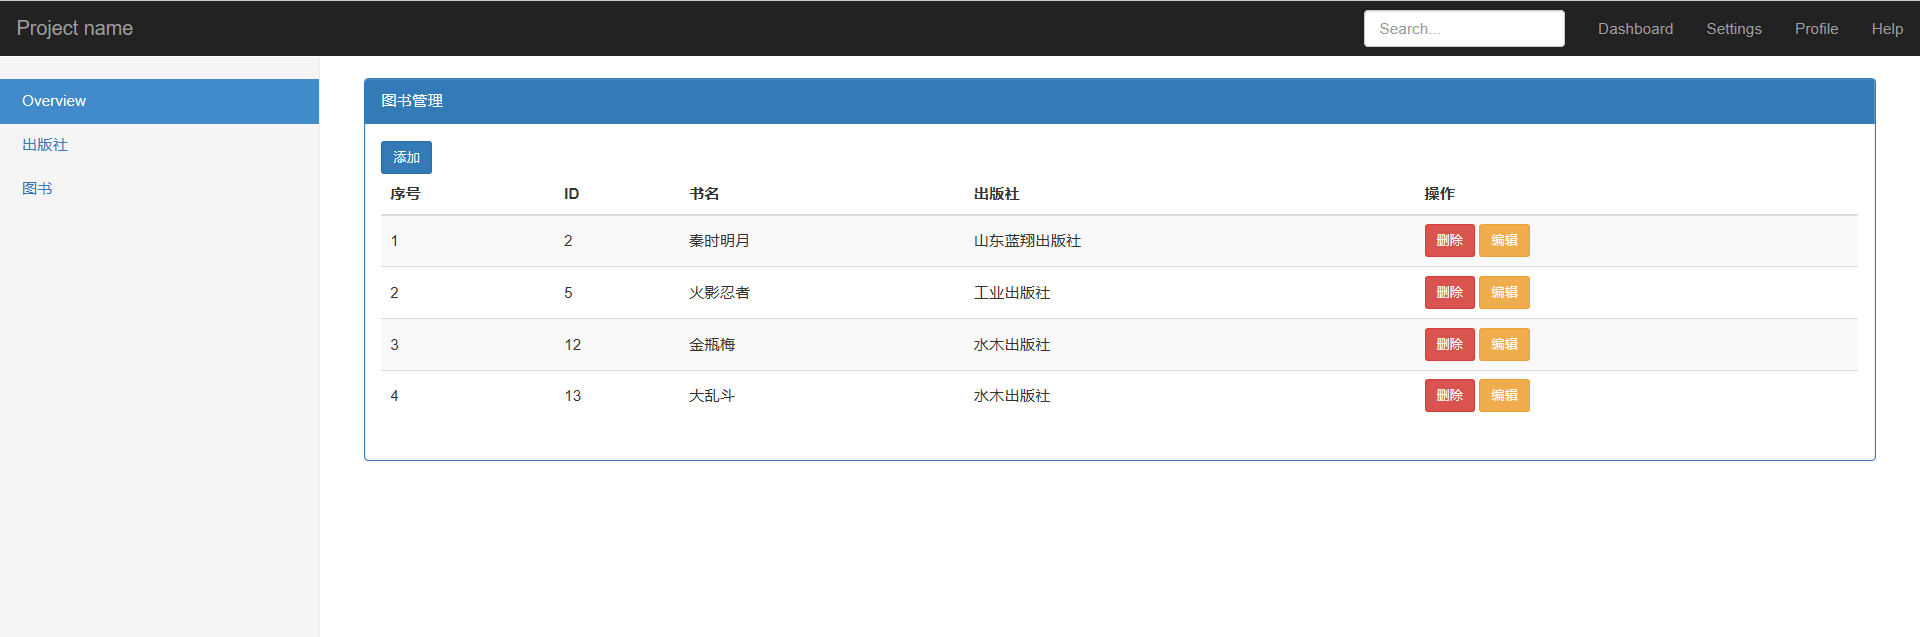
写HTML
- 继续使用前面的bootstrap样式
- 展示的内容是写在 table 中的。
1 | <div class="panel panel-primary"> |
效果
增加
建立对应关系
urls.py 下的 urlpatterns中添加:
1 | url(r'^book_add/', views.book_add), |
写对应函数
views.py
1 | def book_add(request): |
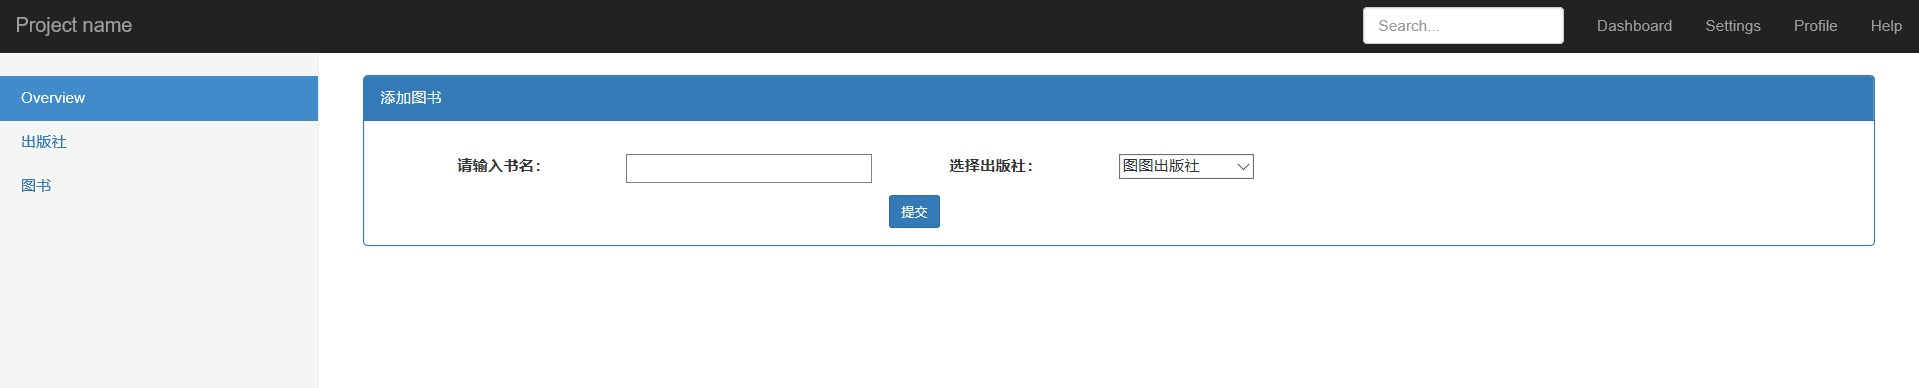
写HTML
book_add.html
- 对于这个页面来说,内容是一个form
1 | <div class="panel panel-primary"> |
效果

删除
建立对应关系
urls.py 下的 urlpatterns中添加:
1 | url(r'^book_del/', views.book_del), |
写对应函数
views.py
1 | def book_del(request): |
修改HTML
在book_list.html 增加对error的输出
1 | <div class="panel-body"> |
编辑
建立对应关系
urls.py 下的 urlpatterns中添加:
1 | url(r'^book_edit/', views.book_edit), |
写对应函数
views.py
1 | def book_edit(request): |
写THML
book_edit.html
- 编辑与添加相似,都是在表单中完成的,只不过编辑会将原来用户输入的值显示出来。
1 | <div class="panel-heading">编辑图书</div> |
效果

小结
本章完成对图书的增删查改,在出版社的管理的基础上,增加了外键。
对于外键我们使用
pid = models.ForeignKey('Publisher',on_delete=models.CASCADE)来创建外键,这里pid是一个对象,在数据库中实际存在的是pid_id,这样做的好处在于,有了图书这个对象,就可以找到它关联的对象,从而操作这个对象。对于这个方法,里面有一个关键字参数
on_delete需要我们去选择一种合适的方式,在django1.11.23中可以不设定,但对与django2.0是必须设定的。__str__:当打印对象,先找str方法,没有就去父类中找。__repr__: 当打印对象列表,对象字典的时候,只会调用repr,在类中我们可以写__repr__ = __str__来使两个方法相同。模板语法:
1
2
3
4
5
6
7{% if 条件 %}
语句1
{% elif 条件 %}
语句2
{% else %}
语句3
{% endif %}
作者的管理
作者与书是多对多的关系,对于与这种关系,我们该如何处理呢?这也是本章的核心内容,其余都和前面相似,所以这一部分不会完全复制代码,只将关键步骤和不同之处记录下来。
准备工作
使用orm创建类
- Book或Author中任意一方都可以添加多对多关系。
- 使用
models.ManyToManyField()设置
1 | class Author(models.Model): |
执行迁移
1 | python36 manage.py makemigrations |
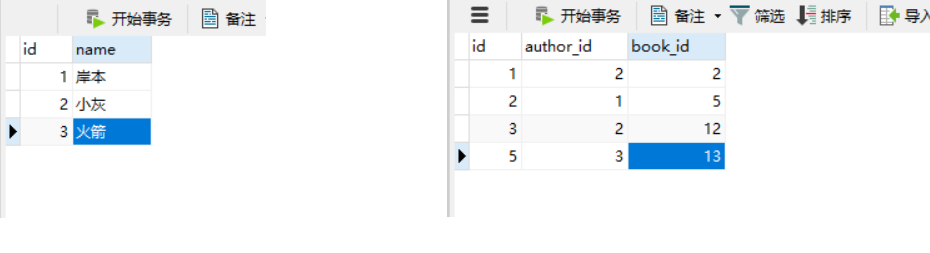
nvicate添加记录
结果如下:
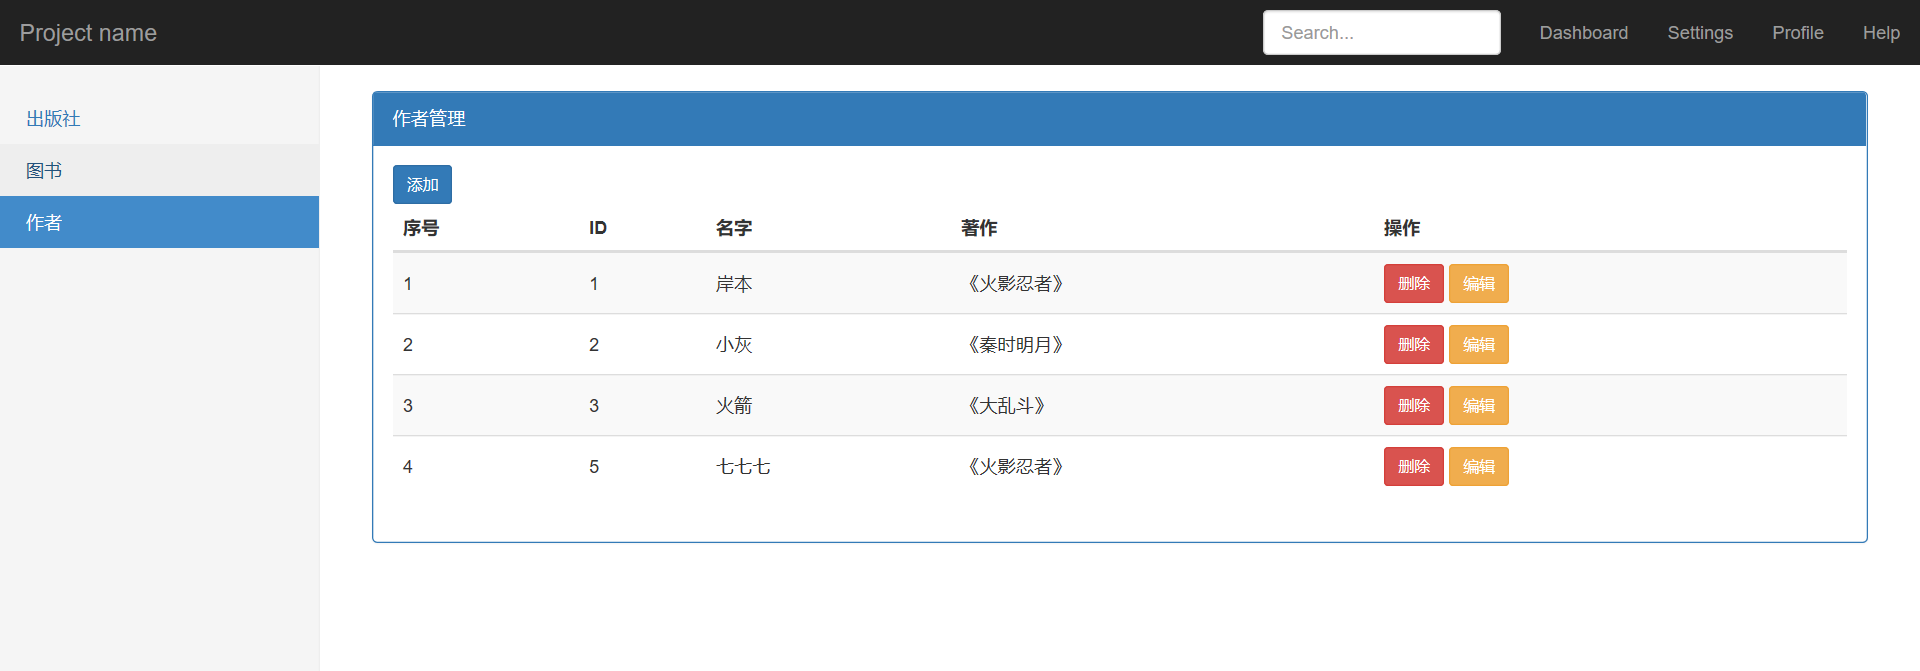
展示
建立对应关系
urls.py 下的 urlpatterns中添加:
1 | url(r'^author_list/', views.author_list), |
写对应函数
1 | def author_list(request): |
写HTML
author.books是一个关系管理对象,通过 all 方法可以查询 作者所关联的所有书籍对象。- 模板中函数是不需要加括号的,如 {{author.books.all}}
1 | <a href="">添加</a> |
效果
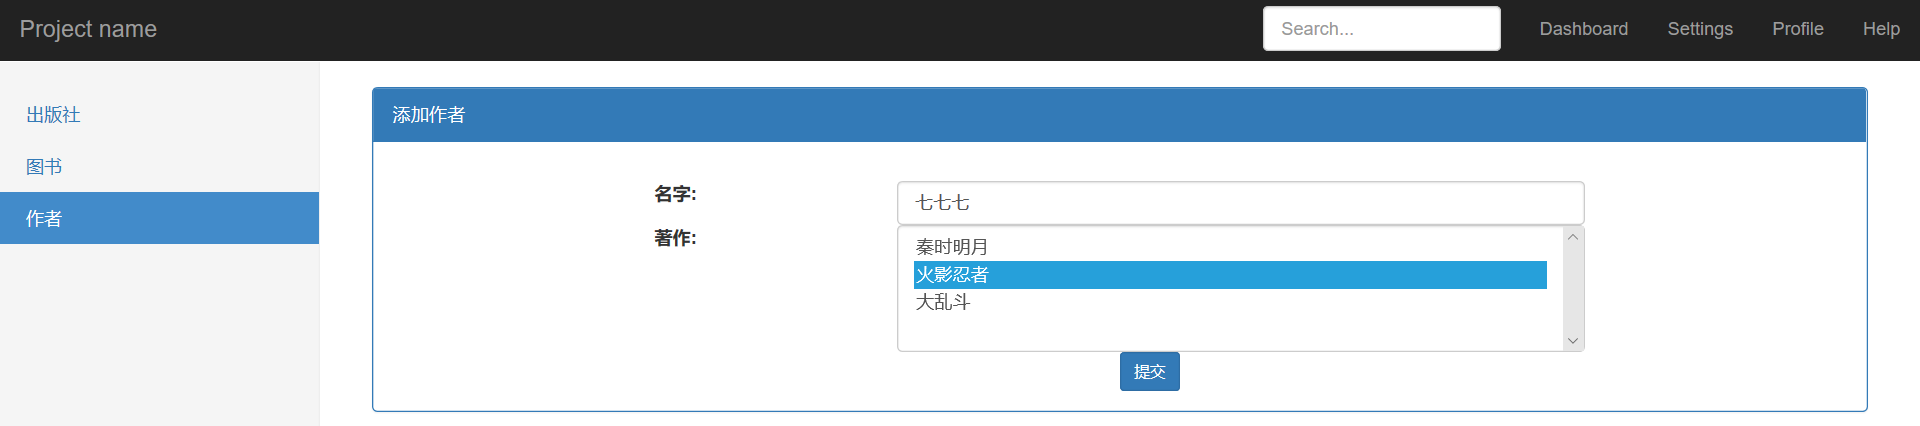
增加
建立对应关系
1 | url(r'^author_add/', views.author_add), |
写对应函数
- 通过
关系管理对象.set( [1,3,4] )来为author_books关系表中添加内容 - get 只能获取一个元素(最后一个)
- getlist 获取列表
- 关系管理对象.set(列表) 列表中的是主键,字符串也不怕,它会帮你处理。
1 | def author_add(request): |
写HTML
- 书籍是通过 select 来进行选择的,需要加入multiple 。
1 | <form action="" method="post"> |
效果

删除
建立对应关系
1 | url(r'^author_del/', views.author_del), |
写对应函数
作者 — 对应表 — 书籍
删除作者/书籍,任意一方后,对应表中的记录会消失,但是删除了作者,这本书还是存在的。
1 | def author_del(request): |
写HTML
补全 author_list.html 中的删除
1 | <a href="/book_del/?pk={{ book.pk }}" class="btn btn-danger btn-sm">删除</a> |
编辑
建立对应关系
写对应函数
- 对于传入参数中的书籍需要进行检查,对这个列表进行一次深拷贝,不然如果是赋值操作的话,两个列表的内容都会减少。
author.books.set(books_back)首先会删除所有与这个author对象有关的记录,然后再添加。
1 | def author_edit(request): |
写HTML
相对于 author_add.html 增加了值填充,和已选选项提示。
可以使用成员判断来找出已选择的书。
1 | <form action="" method="post"> |
效果
补充
关系管理对象.set 是先做删除,在做添加。
正/反向操作
正向操作
- 在我们的orm定义中,
ManyToManyField是定义在Author中的。正向操作就是通过Author对象.books 直接拿到关系管理对象。
1 | class Book(models.Model): |
反向操作
那通过Book来拿这个关系管理对象就是反向操作了:
- author_set 是一个 关系管理对象,前面的author是根据类名来的,后面的
_set是固定写法。通过它,可以查询 all,可以设置 set 。
1 | def test(request): |
note:需要在urls.py中设置对应关系 url(r'^test/', views.test),
打印如下内容:
1 | <QuerySet [小灰]> <class 'django.db.models.fields.related_descriptors.create_forward_many_to_many_manager.<locals>.ManyRelatedManager'> |
创建多对多关系中第三张表的方法
方式一
django通过ManyToManyField自动创建第三张表
优点:通过 关系管理对象(
ManyRelatedManager),可以查询 all ,可以为第三张表添加记录 set缺点:列是固定的(一个主键两个外键,没有其他内容)
1 | class Book(models.Model): |
方式二
手动创建,添加外键
- 优点:你可以自由添加字段
- 缺点:没有关系管理对象 ,从book/author不能直接得到 Book_Author的内容。
1 | class Book(models.Model): |
方式三
自己创建 + ManyToManyField
优点:有了 关系管理对象,我们可以查询了 all ,通过 Author.books.all 或 book_set.all 查询;也可以定义额外的字段了
缺点:关系管理对象只能查询,不能设置(set),因为有额外的字段,考虑到没有这些字段的情况,从少的一方到多的一方是不能在进行设置的。
需要设置
through
1 | class Book(models.Model): |
一种特殊情况
在上面Book_Author这张表中有两个外键,那如果在添加一个 tuijian_author 这个外键,它来自Author,这样我们需要额外设置参数来进行解释,编译器不至于混乱。
混乱来自:当进行反向查询的时候,不知道是 author 还是 tuijian_author
而且如果直接设置两个外键会产生重名问题,出现两个Author.book_author_set
1 | app02.Book_Author.author: (fields.E304) Reverse accessor for 'Book_Author.author' clashes with reverse accessor for 'Book_Author.tuijian_author'. |
在
ForeignKey中需要设置related_name,这在上面的错误中也提到了。在
ManyToManyField中需要设置through_fields来指明 Book_Author 中的哪两个字段是多对多关系,而且这个列表是有顺序要求的。
1 | class Book(models.Model): |
小结
django的所有命令
下载安装
pip install django == 1.11.23 -i 源
创建项目
django-admin startproject 项目名
启动项目
manage.py目录下 : python manage.py runserver
创建app
python manage.py startapp app名称
数据库迁移
python manage.py makemigrations 扫描app下的models的变更记录 后面可以加具体app名称
python migrate 同步, 后面可以加具体app名称
配置
TEMPLATES 模板 DIRS
静态文件
STATIC_URL = ‘/static/‘
STATICFILES_DIRS = [
os.path.join(BASE_DIR, ‘static’),
]
数据库 DATABASES
ENGIN 引擎
NAME 数据库名
HOST
PORT
USER
PASSWORD
中间件
注释csrf,提交post请求
注册app
INSTALL_APPS= [
‘app01.apps.App01Config’
]
django使用MySQL数据库的流程
切换数据库操作模块 pymysql, 写在与settings同级目录下的
__init__.pyimport pymyysql
pymysql.install_as_MySQLdb()
创建一个MySQL数据库
在app下的models中写类
制作迁移文件
执行数据库迁移命令
request
- request对象:
- GET:url上携带的参数 字典 ?k1=v1
- POST:POST请求的请求数据 get, getlist
- method GET POST PUT
response
HttpResponse(‘字符串’) 返回字符串
render(request,’模板’, { 模板渲染}) 返回一个完整的页面
redirect(‘url的路径’) 重定向 响应头 Location:url + 302状态码
1
2
3
4
5def test(request):
# ret = HttpResponse('ok')
response = HttpResponse(status=302)
response['Location'] = '/register/'
return response
orm
对应关系
- 类 表
- 对象 记录
- 属性 字段
查询
1 | models.Publisher.objects.get(name = 'xxx') # 获取一个满足条件的对象,找不到或多个就报错 |
新增
1 | Publisher |
删除
1 | 查询这个对象/对象列表 -> delete |
编辑
1 | book_obj.pub = pub_obj |
模板
render(request, ‘模板的文件名’,{k1:v1})
1 | {{k1}} v1 |
下一篇为 Django模板系统,第一个需要了解的细节,学习了这一块,就可以得到任何想要的页面。